
creekX Media Server / Visual guide
Set up your workspace
Use this page when you're setting up a new workspace: its name, time zone and schedule defaults. API keys and webhooks live under Developers in the new workspace, and under Settings in the current release.
On this page
Step 1Name and save your workspace
Choose Settings. Edit the workspace name, scroll down to Save changes, then leave and return to check it stayed saved. The save button is below the part shown here. We saved CreekX Studio and checked it on return. Review the time-zone and schedule defaults against your actual plan.
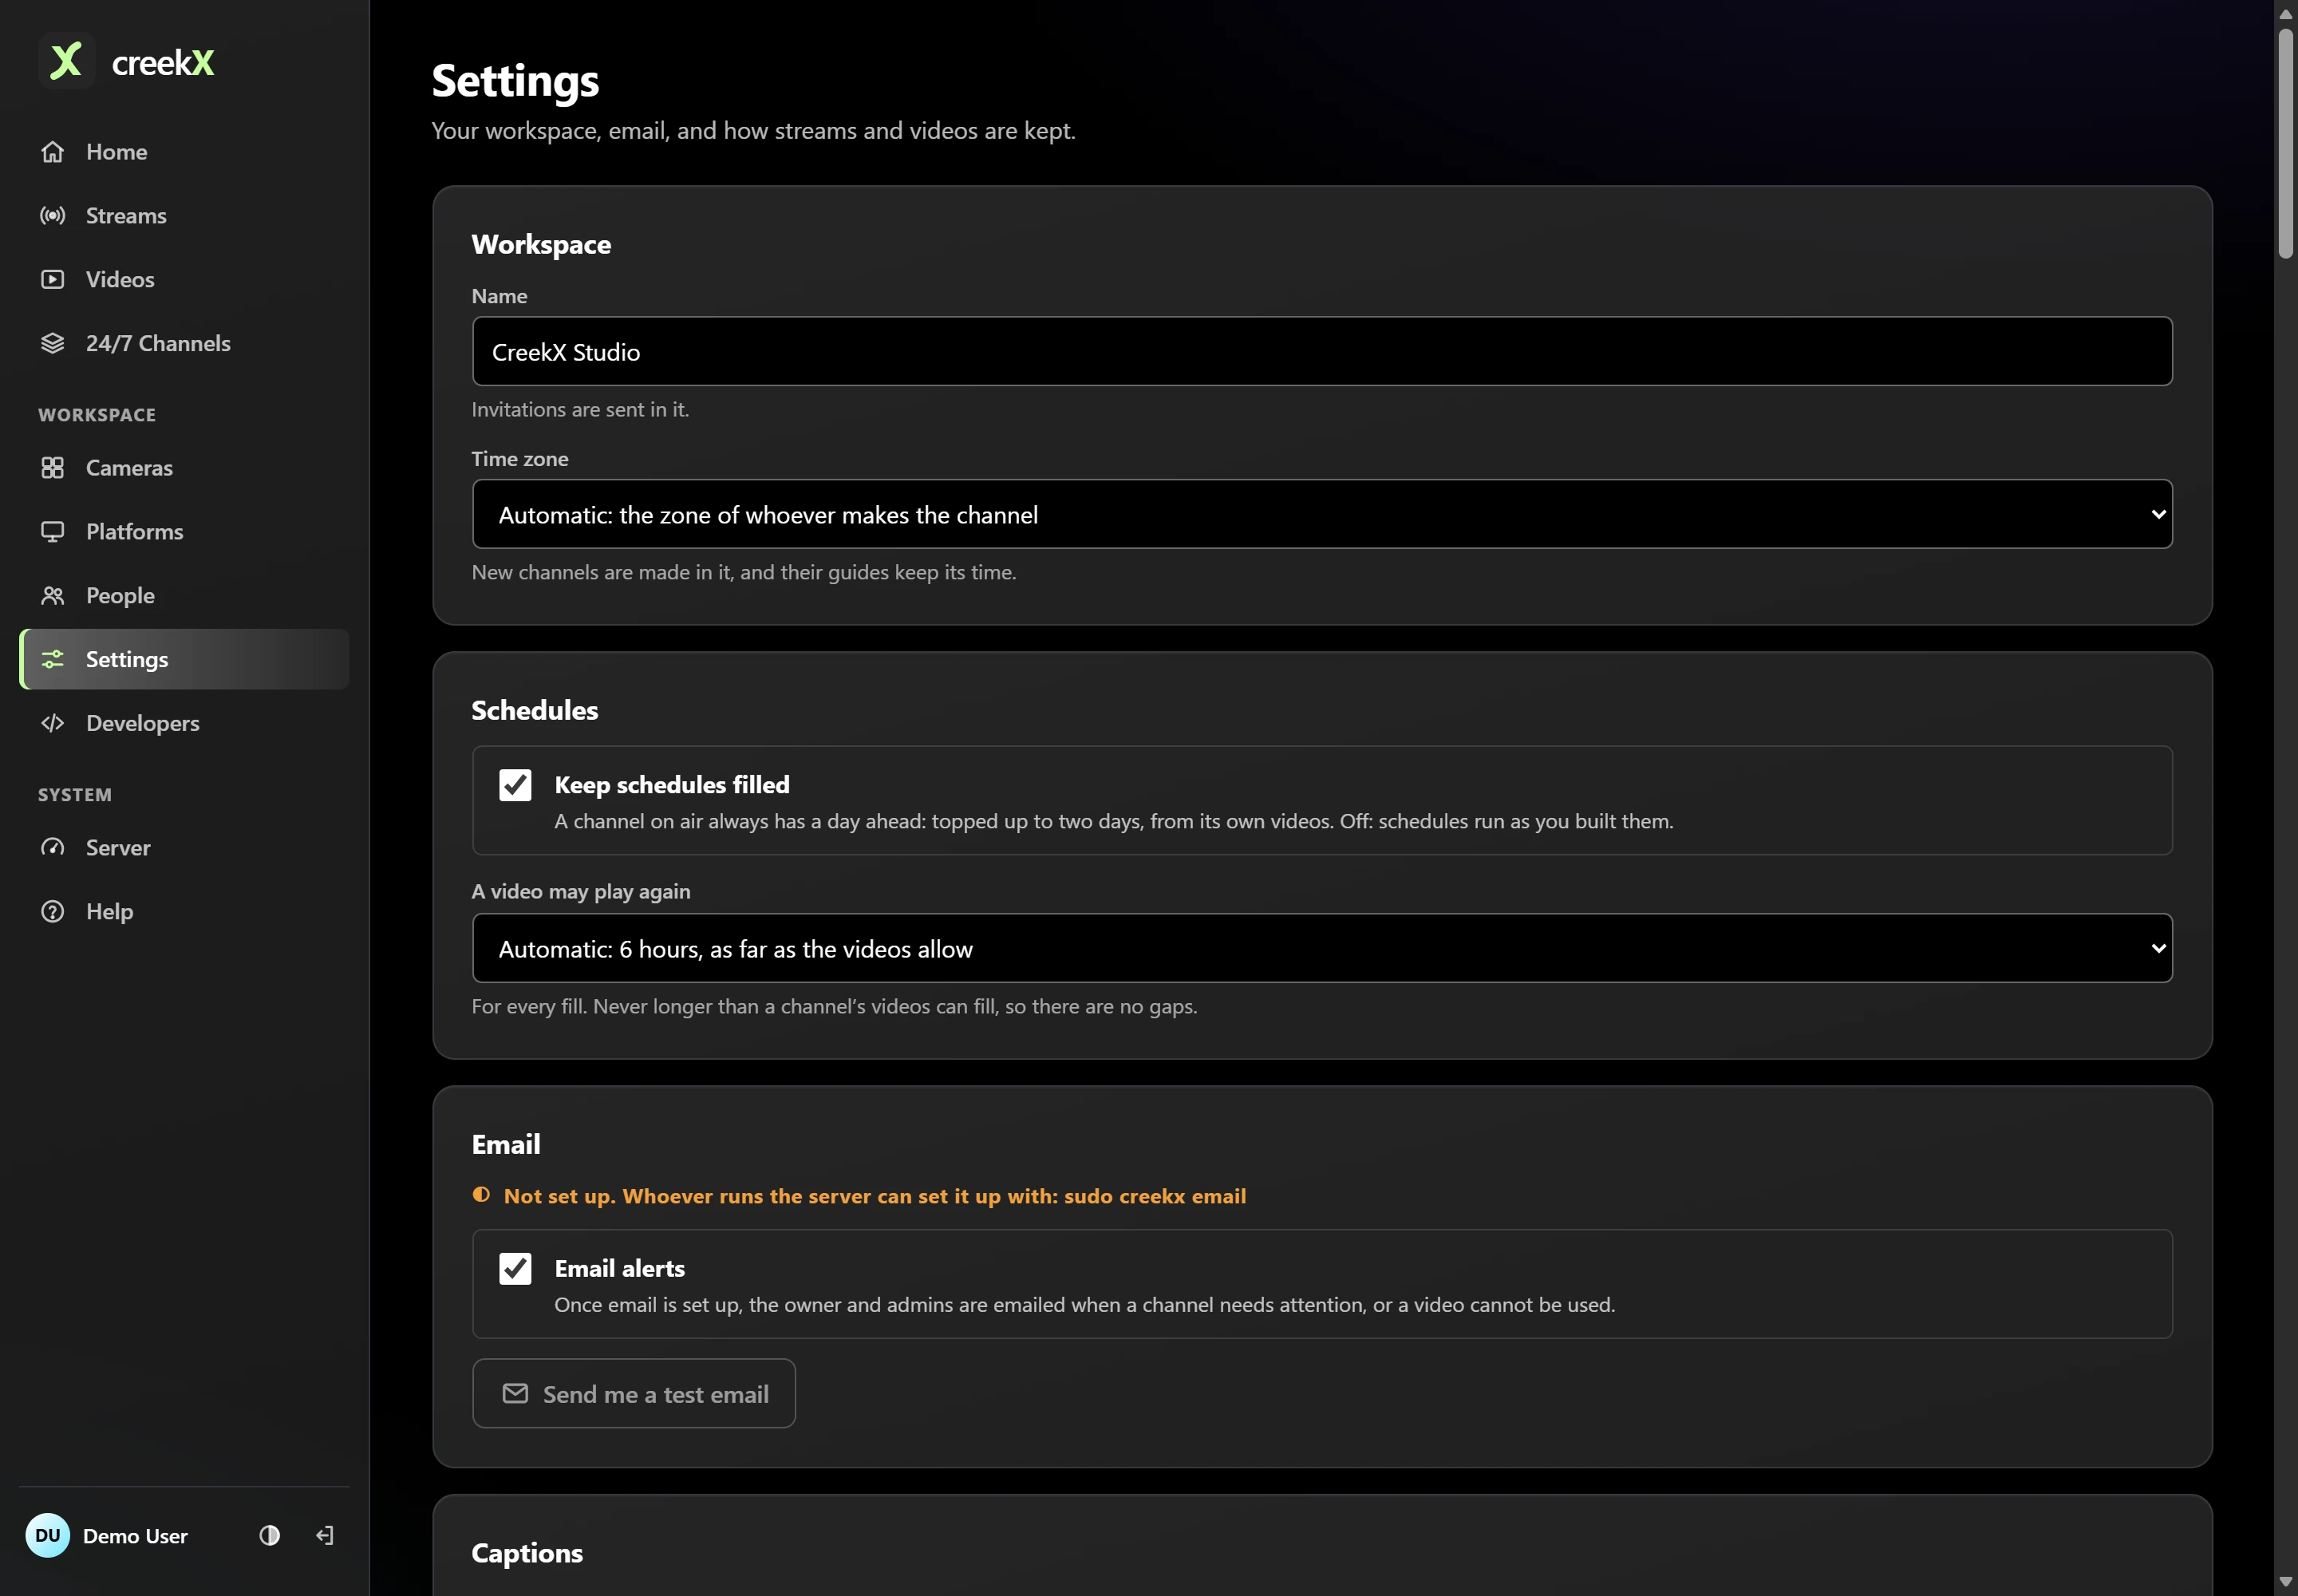
Click: Settings
You should see: The workspace name and defaults. This test uses company-only example content.
Step 2Use Developers for API work
Choose Developers for API recipes, API keys and webhooks. Keep keys out of screenshots and shared documents. The connection address and code values in this capture are hidden.
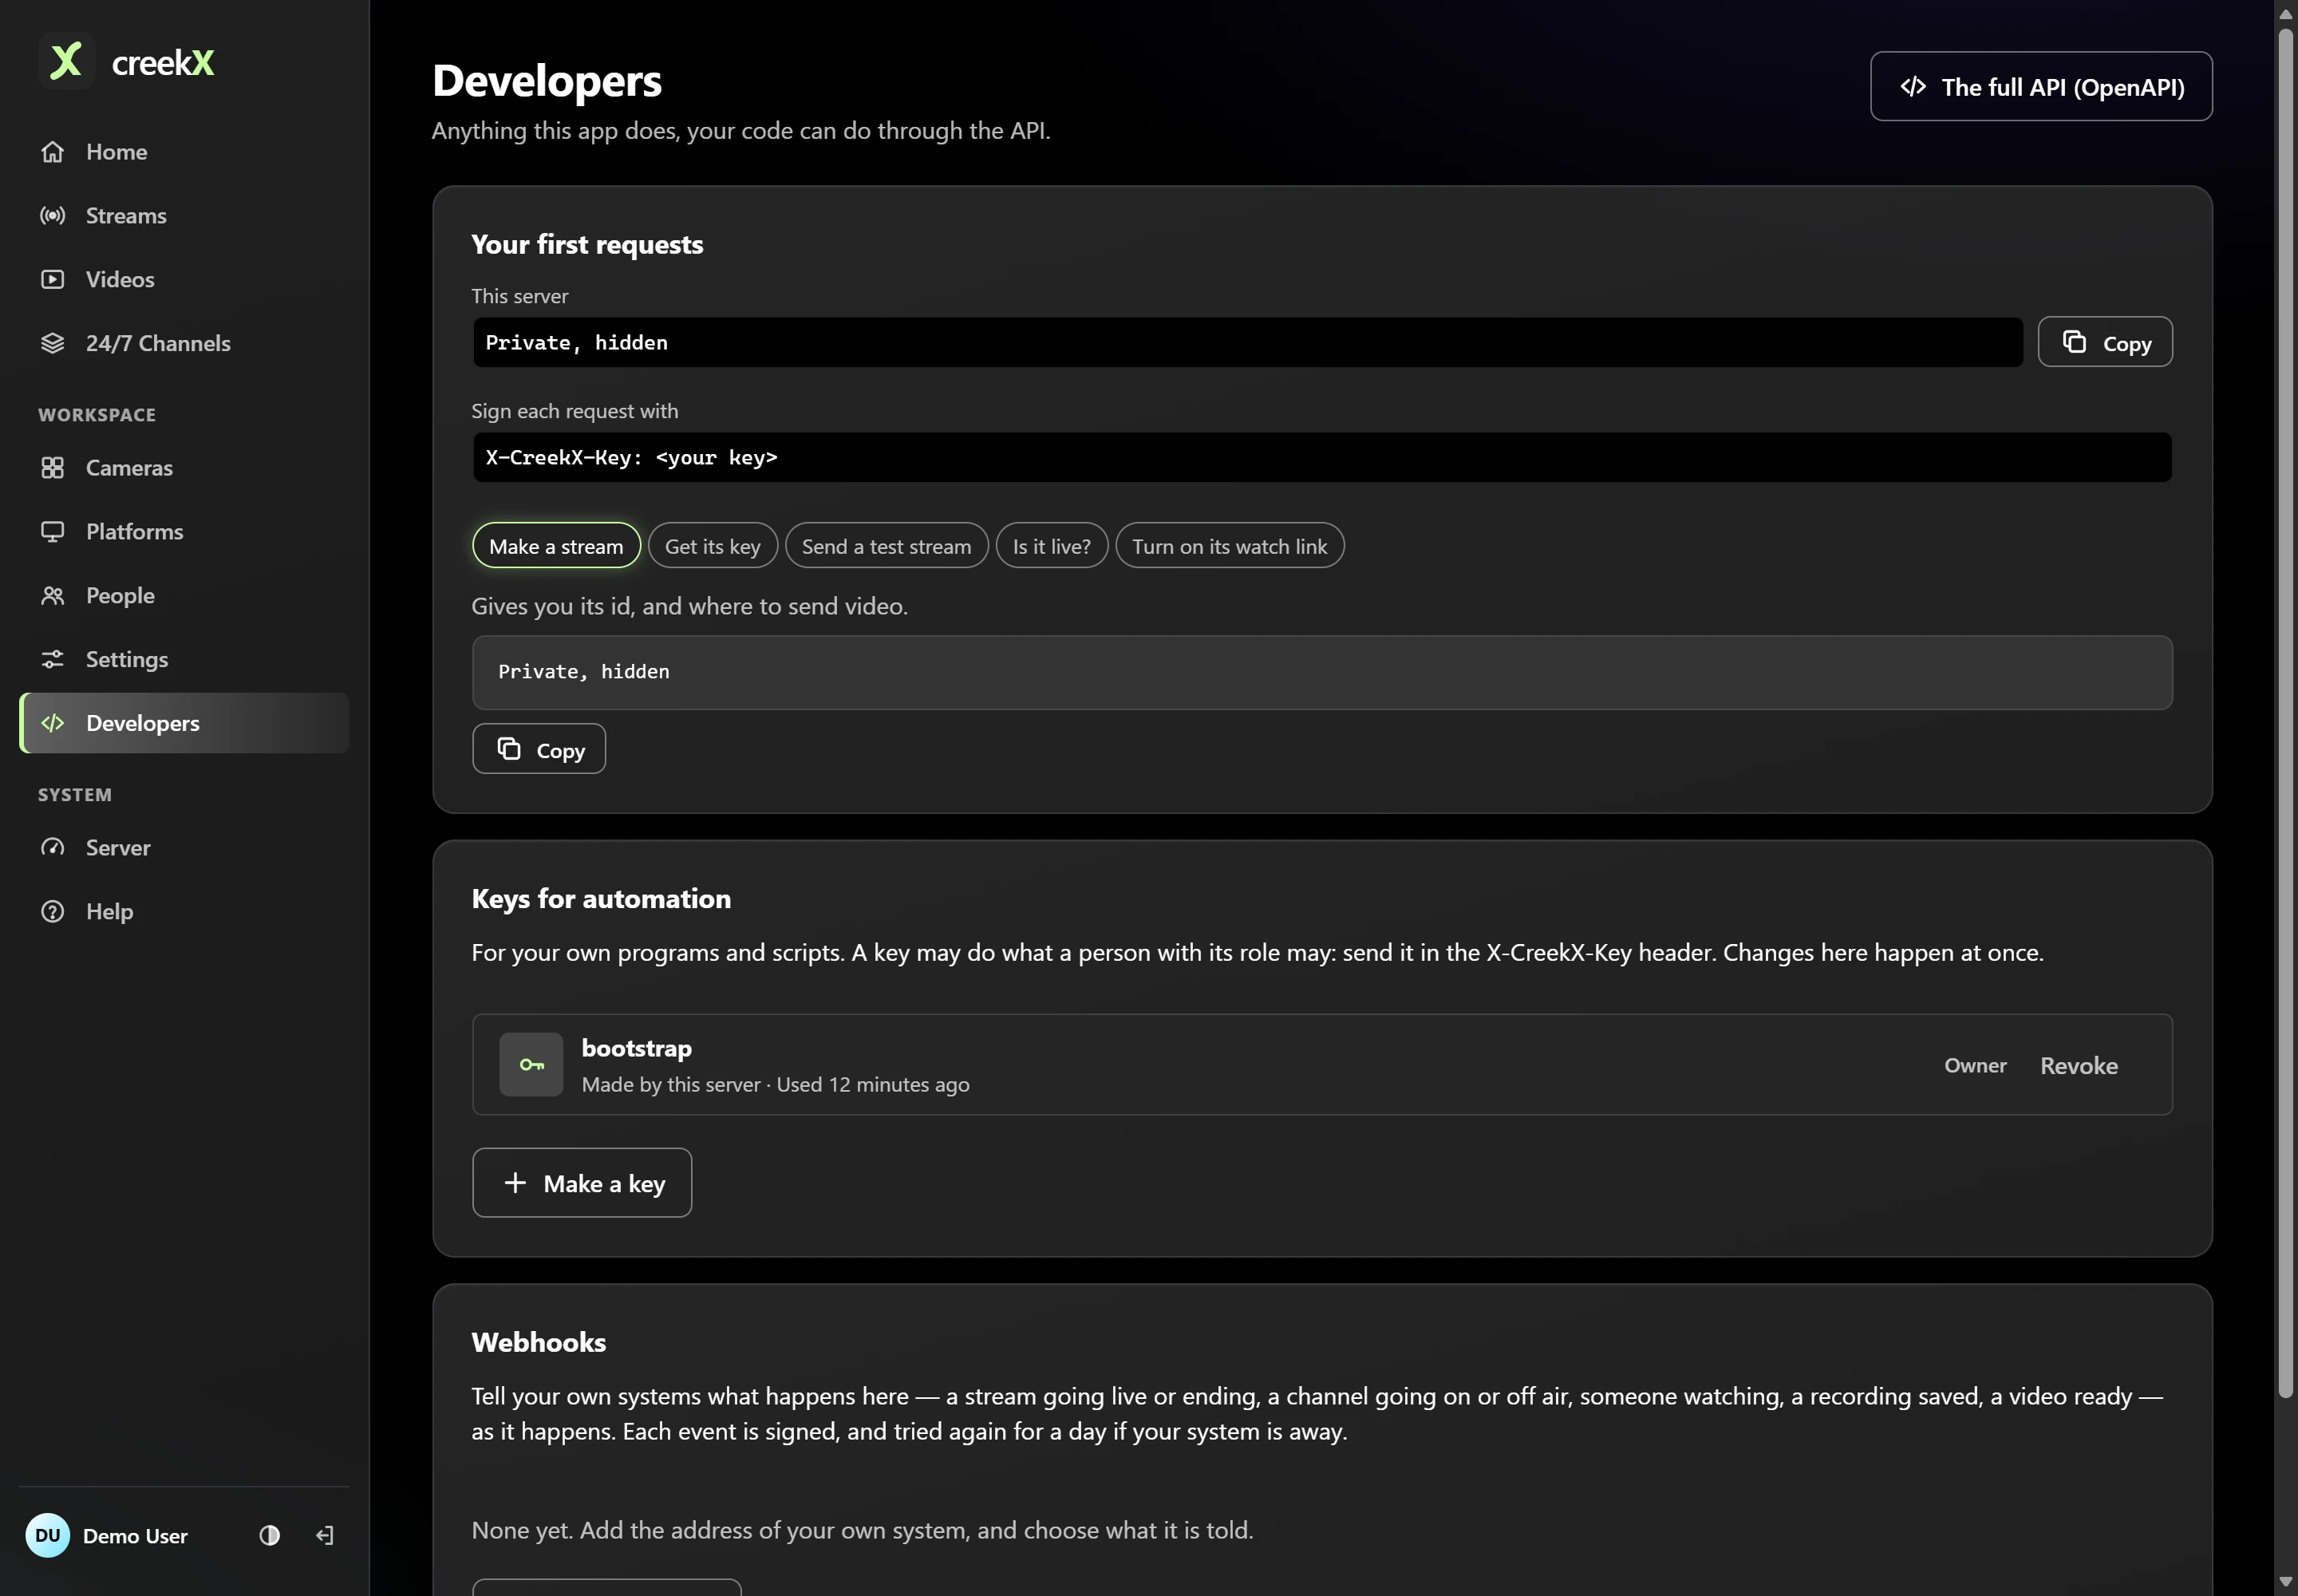
Click: Developers
You should see: Developer tools, not the workspace-name form. This guide does not create or expose a new API key.
Next steps
.
How do I know it saved?
Change the name, save, leave the page and come back. Check that the time zone matches your real schedule. These screenshots show the new interface. If yours differs, use the keys and webhooks guide for your version, and keep credentials out of screenshots.